Agarose Gel Electrophoresis (Demo)
superseded Version 1 11/20/2026, 2:42:54 PM
Initial release
Readers follow version 2, not this one. Open version 2
Document
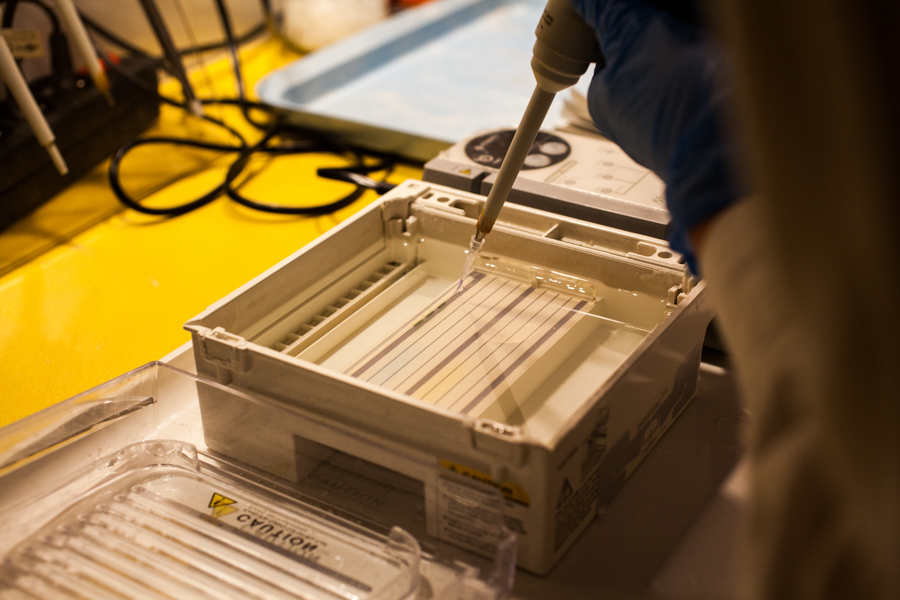
Figure: PCR reaction product being applied to an agarose gel. (c) Karolina Fok / Wikimedia Commons / CC BY 4.0
Agarose Gel Electrophoresis (Demo)
1. Purpose
This protocol describes how to separate DNA/RNA by size using a horizontal gel.
2. Scope
Analysis of PCR products and genomic DNA.
Disclaimer: This is a demonstrational document only and should not be used for actual laboratory work without verification by qualified personnel.
3. Responsibilities
- Personnel must be trained in lab safety.
- Management must ensure equipment is available.
4. Safety Precautions
| Hazard | Source | Mitigation |
|---|---|---|
| Electrical | Power Supply | Do not touch the tank while the run is active. |
| Chemical | Ethidium Bromide | Wear gloves. EtBr is a mutagen. |
| Radiation | UV Light | Wear goggles when looking at the transilluminator. |
5. Materials and Equipment
5.1 Equipment
- Electrophoresis Tank
- Power Supply
- Casting Tray and Combs
- Microwave
- UV Box (Transilluminator)
- Pipettes
5.2 Reagents
- Agarose
- Running Buffer (TAE)
- 6X Loading Dye
- Ethidium Bromide (EtBr)
- DNA Ladder
6. Procedure
6.1 Gel Preparation
- Weigh Agarose: Add 1.0g of agarose to 100mL of buffer for a 1% gel.
- Melt: Heat in microwave until clear. Use caution as the glass will be hot.
- Cool: Let the flask cool until it is comfortable to touch.
- Stain: Add EtBr to the molten agarose (approx 5 µL).
- Pour: Place the comb in the tray and pour the gel. Wait for it to harden.
6.2 Sample Loading and Running
- Setup: Place the gel in the tank and fill with TAE buffer until covered.
- Prepare Samples: Mix DNA with loading dye on a piece of parafilm or in a tube.
- Load: Carefully pipette samples into the wells.
- Reference: Figure 1 shows the application of a PCR product.
- Run: Set the power supply to 100V. Run for 45 minutes or until the dye reaches the end.
6.3 Visualization
- Remove the gel from the tank and place it on the UV transilluminator.
- Turn on the UV light to see the bands.
- Record the results in the lab notebook. (Note: Digital image capture setup is pending for next revision).
7. Waste Disposal
Dispose of gels in the hazardous waste bin.