This Standard Operating Procedure (SOP) outlines the standard workflow for the separation of DNA or RNA fragments based on their size using horizontal agarose gel electrophoresis.
2. Scope
This procedure is applicable to the analysis of PCR products, enzyme digestion fragments, and purified genomic DNA or RNA within a laboratory setting.
Disclaimer: This is a demonstrational document only and should not be used for actual laboratory work without verification by qualified personnel and adherence to institution-specific safety guidelines.
3. Responsibilities
All personnel performing this procedure must be trained in basic molecular biology techniques and safe handling of equipment and chemicals.
The Laboratory Manager is responsible for ensuring that all equipment is calibrated and maintained.
4. Safety Precautions
Hazard
Source
Mitigation
Electrical
Electrophoresis Power Supply
Ensure leads are connected correctly; do not touch the apparatus when power is on; use equipment with interlocks.
Thermal
Molten Agarose
Use heat-resistant gloves when handling flasks from the microwave/autoclave.
Chemical
Ethidium Bromide (EtBr)
CAUTION: EtBr is a potential carcinogen and mutagen. Wear gloves and a lab coat; handle EtBr-containing gels and buffers within a designated area; dispose of waste according to institutional guidelines.
Radiation
UV Light
Wear UV-blocking face shields or goggles; minimize exposure time to UV light.
5. Materials and Equipment
5.1 Equipment
Horizontal Electrophoresis Chamber/Tank
Power Supply (capable of constant voltage or current)
Calculate Agarose Amount: Determine the desired gel percentage (w/v) based on the expected size of the DNA fragments. For example, to prepare 100 mL of a 1% agarose gel, weigh out 1.0 g of agarose powder.
Dissolve Agarose: Combine the weighed agarose powder with 100 mL of 1X running buffer (TAE or TBE) in a microwavable flask. Swirl to mix.
Heated Dissolution: Heat the mixture in a microwave using short bursts (30 seconds), swirling in between, until the agarose is completely dissolved and the solution is clear. CAUTION: Use heat-resistant gloves; the flask will be hot.
Cooling: Allow the molten agarose to cool on the bench or in a water bath to approximately 50–60°C.
Add Stain (Optional pre-staining): If pre-staining the gel with Ethidium Bromide, add 5 µL of EtBr stock solution (10 mg/mL) per 100 mL of cooled agarose (final concentration: 0.5 µg/mL). Swirl gently to mix without creating bubbles.
Cast the Gel: Seal the ends of the gel casting tray (using tape or gaskets), and place the desired comb into the tray. Slowly pour the cooled agarose into the tray.
Solidification: Allow the gel to sit undisturbed at room temperature for 30–45 minutes until it is completely solidified and appears opaque.
6.2 Sample Loading and Running
Prepare Tank: Carefully remove the tape/gaskets from the casting tray and the comb from the gel. Place the tray containing the solidified gel into the electrophoresis chamber.
Add Buffer: Fill the chamber with 1X running buffer (use the same buffer used to make the gel) until the gel is completely submerged (approximately 2-5 mm over the gel surface).
Sample Preparation: In a sterile microcentrifuge tube, mix the DNA sample with 6X Loading Dye. For example, mix 5 µL of sample with 1 µL of dye.
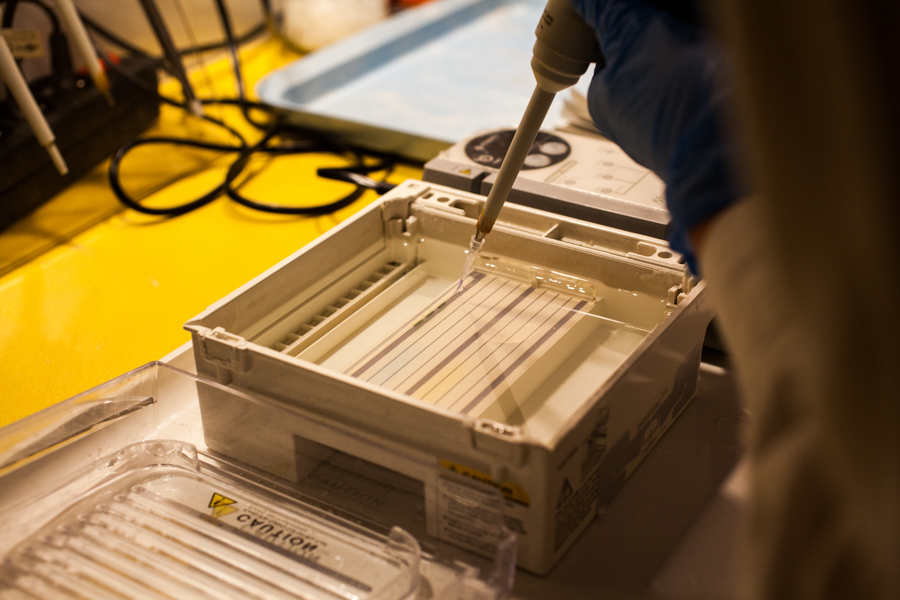
Load Samples: Using a fresh pipette tip for each sample, carefully load the prepared sample into the wells. Ensure the negative electrode (black) is at the same end as the wells.
Note: Load a molecular weight marker into one or two lanes for size estimation.
Reference: Figure 1 demonstrates the correct technique for applying a PCR reaction product to an agarose gel well.
Figure: PCR reaction product being applied to an agarose gel. “Electrophoresis” by Karolina Fok / Wikimedia Commons / CC BY 4.0
Run Electrophoresis: Place the lid on the tank and connect the leads to the power supply. Set the desired voltage (e.g., 80–120V, or approximately 5V/cm of gel length). Turn on the power supply.
Monitor Run: Confirm that bubbles are forming at the electrodes, indicating current flow. Allow the gel to run until the dye front has migrated approximately 75–80% down the gel length.
6.3 Visualization and Documentation
Discontinue Run: Turn off the power supply, disconnect the leads, and carefully remove the lid from the chamber.
Staining (Optional post-staining): If EtBr was not added to the gel during casting, carefully transfer the gel to a container containing 1X buffer with EtBr (0.5 µg/mL) for 15–30 minutes. Rinse briefly in distilled water or running buffer afterwards.
Visualization: Carefully transfer the stained gel to a UV transilluminator or a gel documentation system. CAUTION: Always wear a UV-protective face shield or goggles.
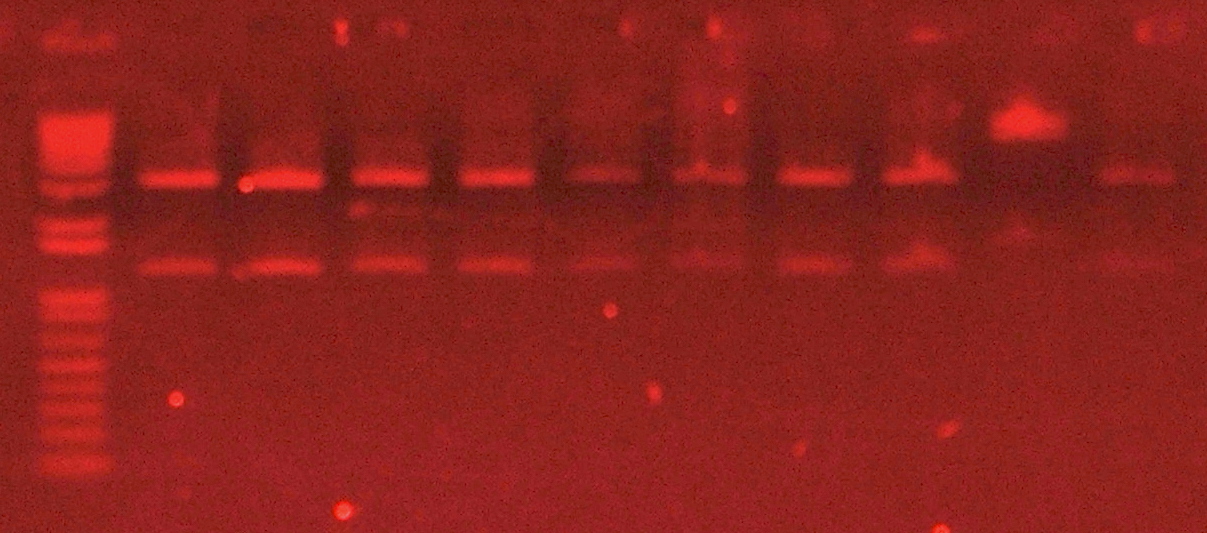
Documentation: Turn on the UV light to visualize the DNA bands. Capture an image of the gel for your records.
Reference: Figure 2 shows the final appearance of an agarose gel stained with ethidium bromide and visualized under UV light, highlighting separated DNA fragments.
Figure: Agarose gel stained with ethidium bromide, visualized under UV light.(c) Sgroey / Wikimedia Commons / CC BY 4.0
7. Waste Disposal
Gels and Buffer (containing EtBr): Dispose of all EtBr-contaminated materials as hazardous chemical waste according to institutional guidelines.
Uncontaminated Waste: Gels and buffers not containing hazardous stains can generally be disposed of as standard biological or chemical waste, provided they adhere to local regulations.